 An
official website of the United States government.
Here's how you know we're official.
An
official website of the United States government.
Here's how you know we're official.
An
official website of the United States government.
Here's how you know we're official.
An
official website of the United States government.
Here's how you know we're official.
Customer Outreach Tool - Help
ASSIST is the Office of Coast Survey's stakeholder engagement and feedback tool. It allows customers to submit questions and comments or report errors on NOAA's nautical charts and navigational products.
Coast Survey aims to respond to all ASSIST inquiries promptly.
How to use ASSIST
ASSIST can be accessed from a computer or mobile device, such as a smartphone or tablet, although a larger screen typically makes the entry process easier.
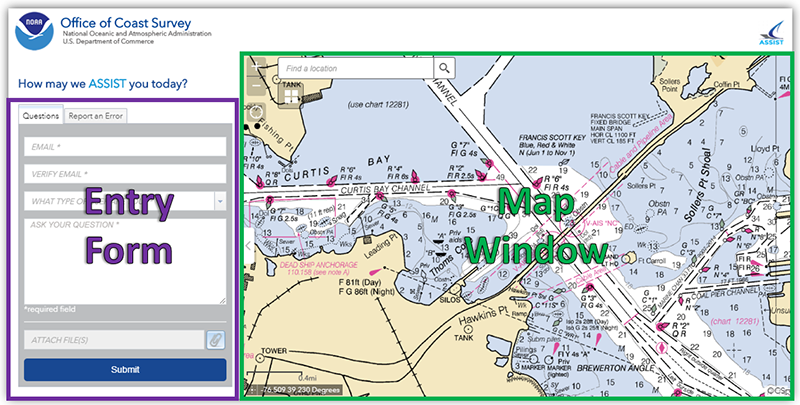
ASSIST is divided into two parts - an entry form and a map window. At the top of the entry form, there are two separate tabs. One tab is labeled "Questions" and should be used to ask a question or provide feedback. The other tab is labeled "Report an error" and should be used to report chart errors that are associated with a specific geographic location.
The map window is used in conjunction with a reported chart error and allows users to drop a pin at the location of the reported error. The pin's latitude and longitude position is then auto populated in the "Report an Error" tab. You can also enter a latitude/longitude position manually.
Submitting a Question
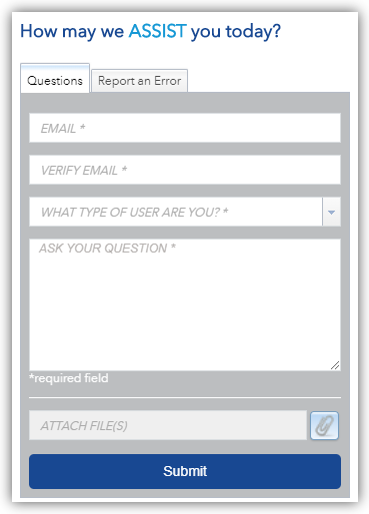
To submit a question or comment, first select the "Questions" tab on the entry form. Next, provide your e-mail address (so that we can respond back), indicate your user type (e.g. professional mariner, recreational boater), enter your question, and add any attachments. After you hit the submit button, you will receive an e-mail informing you that your question has been sent and providing you with an inquiry number which can be used to track your question.
Note that no position is required to submit a question and you will not be able to choose a point on the map.
Reporting an Error
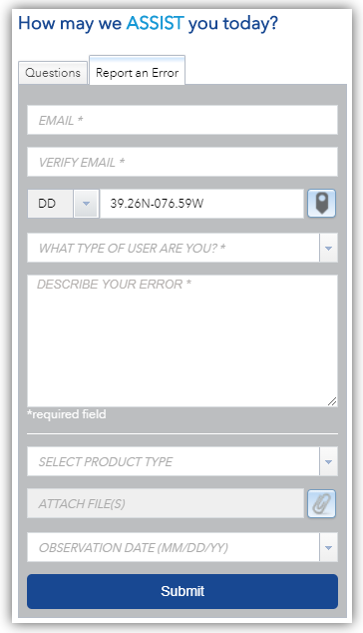
To report an error, first select the "Report an Error" tab on the entry form. In addition to the information that is required to submit a question, it is also necessary to provide the position of the error and the product that you are using. You can also enter the date that the error was observed. Positions can either be entered manually, by typing in the coordinates or by selecting a location on the map.
To enter the position manually, first choose the preferred format and enter the coordinates as shown:
DD (decimal degrees) 36.729142N 122.204318W
DDM (degrees and decimal minutes) 36-43.7485N 122-12.2591W
DMS (degrees, minutes, and seconds) 36-43-44.91N 122-12-15.55W
To enter the position via the map, first click the point icon ![]() . The entry form
will disappear and the map window will expand. Use the tools in the top right corner to pan and zoom,
then click on your desired location. A new blue symbol will show up where you clicked and the position
of your point will be automatically populated in the user form. To return to the user form without
selecting a point, click the arrow on the left side of the map window.
. The entry form
will disappear and the map window will expand. Use the tools in the top right corner to pan and zoom,
then click on your desired location. A new blue symbol will show up where you clicked and the position
of your point will be automatically populated in the user form. To return to the user form without
selecting a point, click the arrow on the left side of the map window.
Navigating the Map Window — Tips and Tricks
To navigate to the general area of interest, you can use the "Find a Location" search box to enter a place name and then select the appropriate choice from the list of matches that are displayed. Then, you can use the plus and minus icons in the upper left of the map window to zoom in or out (you can use your mouse wheel to do this as well). You can pan the map by clicking and holding the left mouse button, and dragging the map.
You can also display a background of your choice in conjunction with the ENC Data by selecting the Basemap Gallery option.
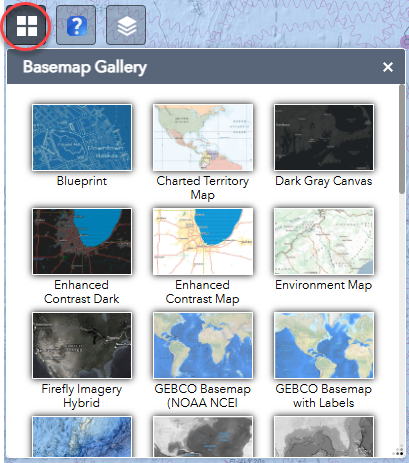
You can change the default symbology of the data displayed in the Map Window by clicking the Layers icon. Choosing "NOAA Chart Display" will show symbology that closely approximates the look of a traditional paper chart, while choosing "NOAA ENC" will show symbology that is associated with Electronic Chart Display and Information Systems. Note that you can expand either option to toggle on or off specific layers of information.
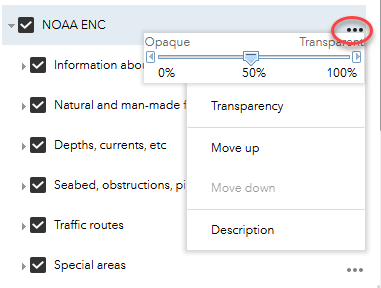
In order to make both the chart layer and your basemap visible, first select the Layers icon. In the window that opens, click the three dots to the right of the your chosen option layer and then use the slider bar to adjust the transparency.

Filling out the Entry Box requested information
Whether you select the "Questions and Comments" tab or the "Report an Error" tab at the top of the entry box, you will be asked to provide some information. Required fields are denoted with an asterisk (*), while all other fields are optional. You also have the ability to attach files, such as images or PDF, to your submission, although there is a total file size limitation of 15 MB. Larger attachments may result in the system taking several seconds to process and notify you that the ticket submission was successful. Waiting for the process to complete will help reduce cases where tickets are accidentally submitted multiple times.